Structural Moisture - Heating


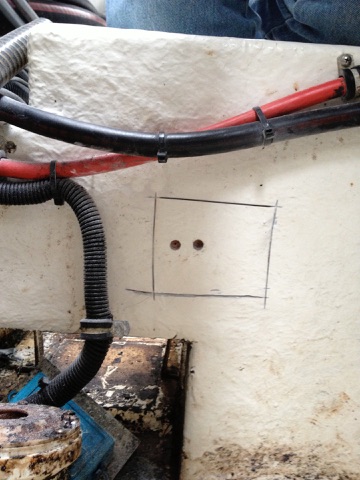
I began heating the bulkhead right after drilling the holes and pulling some additional water out of the fuel tank bay, using the shop vacuum. I tried a few heating tools, including a hot air paint remover and my heavy duty space heater. The space heater seemed to be the best tool for the job, as the hot air gun was too concentrated in one area. The space heater also had a thermostat, so that it would cycle once it reached a certain temperature.
My goal was to bring the bulkhead to approximately 120 degrees and keep it there until the moisture level was dramatically reduced. I put a meat thermometer into the wood in the bulkhead so that I could monitor the temperature. I also needed to enclose the heating area with foil and pads so that the heat was concentrated on the bulkhead. Below are some pictures of the heater doing its thing and the thermometer reading about 120 degrees.
Under Construction
Check Back for Updates
Quick Links:
Back to Home Page
Back to Maintenance Page
I periodically checked the heater and the temperature, as well as the moisture readings. After about 10 hours of heating, the moisture level seemed to be dropping from the 40-50% range down into the 30-40% range. My expectations were that it would initially take a while to evaporate a fair amount of the moisture, then the progress should be more rapid as the bulkhead dries out.
As the process seemed to be heating the bulkhead fairly well, I expanded the effective area to both port and starboard sides of the bulkhead. this approach should also add some heat to the center engine stringer. Below are some pictures of the expanded setup. I also placed a thermometer to monitor the ambient air around the bulkhead. My plan was to keep it around 120 degrees F.


After a couple of days of drying, the moisture started to show signs of reduction in the upper areas of the bulkhead. The lower areas of the bulkhead were still quite wet. It appeared the the water was moving down in the bulkhead as the hydrostatic pressure was relieved by the hole in the bottom of the bulkhead.
It seemed that an additional hole in the lower bulkhead would be needed, as the starboard side had no way to drain. The initial hole was just to the port side of the keel and the 2 limber holes along the keel were preventing water from draining out of the starboard side.
However, the access to the lowest portion of the bulkhead just starboard of the keel was restricted by the shower bilge mounting plate (pic below). So, I had to figure out a creative way to drill a hole in that area.


Skinning the Wet Areas -
It appeared that a greater amount of exposed wood surface area would be needed to dry out the bulkhead and adjacent areas. So, I used a cutting wheel to cut a couple of areas of the fiberglass skin. Then I pried off the fiberglass layer, exposing the wood.
My plan was to do a few more areas, then apply heat again, with hopes of much greater evaporation. Exposing the wood also allowed me to assess the condition of the wood and see if there is any rot in the progressive stages, etc.
These two areas (pictured below) looked very wet, but they were solid.


